- 把戏 tags:
- foss
- gimp published: true comments: true
Inspired by a "Call to action" tutorial of Photoshop, I'd like to do the same thing with free and open source software, GIMP.
Before we start the journey, it's better to get well prepared. Take a look at the powerful plugin "Layer Effects". It provides you complete functionality as "Layer Style" in Photoshop does which is of critical importance in such kind of image manipulation. Follow the installation guide and I won't spend many words about this step.
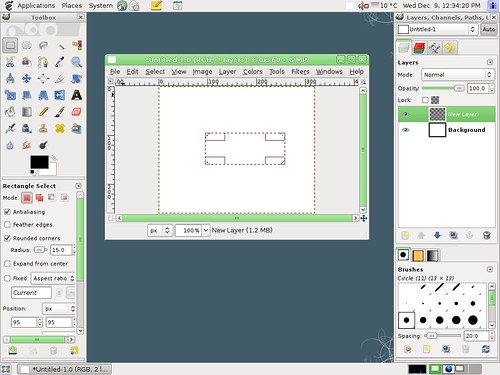
Open your gimp, create a new canvas with custom size (which makes you feel comfortable)
New a layer, use selection tool to create a rounded rectangle selection area.
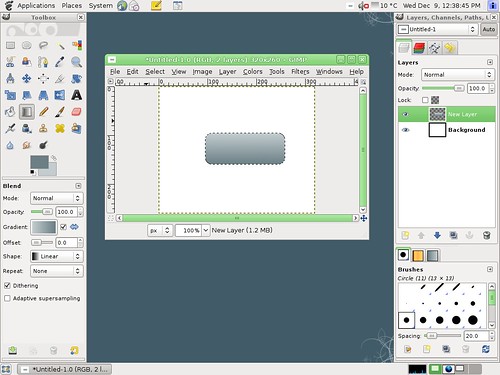
Fill the selection with gradient color.
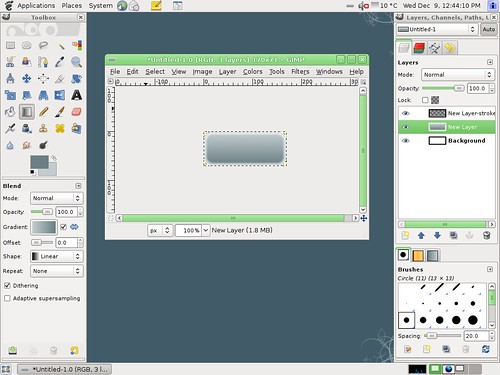
Resize the canvas. Glow the selection with 3px by menu command "selection->glow". The crop the canvas by selection using "image->crop by selection".
Then we apply some layer effects to beauty the button.
- layer effects: inner glow, white 75% opacity, size 5
- layer effects: stroke 1px
Place some text on the button such as "Sign Up". Bold sans font(DejaVu sans or Helvetica bold) is recommended here.
Use gradient overlay effect on the text. As the layer effects plugin doesn't support gradient overlay on text, we have to do it in a different way. First, create a new layer. Then convert text to selection with context menu command. Gradient fill the selection and hide the original text layer at last. Now we got:
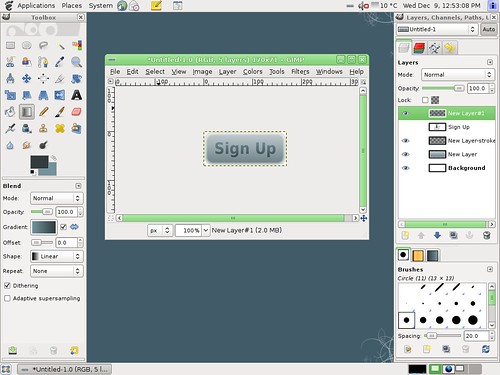
Don't stop here. Add layer effects on the new layer:
- inner shadow, black, size 2px, distance 2px, angle 90
- drop shadow, light, size 2px, distance 2px, angle 90

You can tune the color schema by yourself along the process :)